After you have set up your sections in your checklist, you will be ready to add the questions to the form.
- Navigate to the section you are working on by clicking the section name in the header row
- Click on the question type you would like to add
- You can also drag and drop a new question into the section
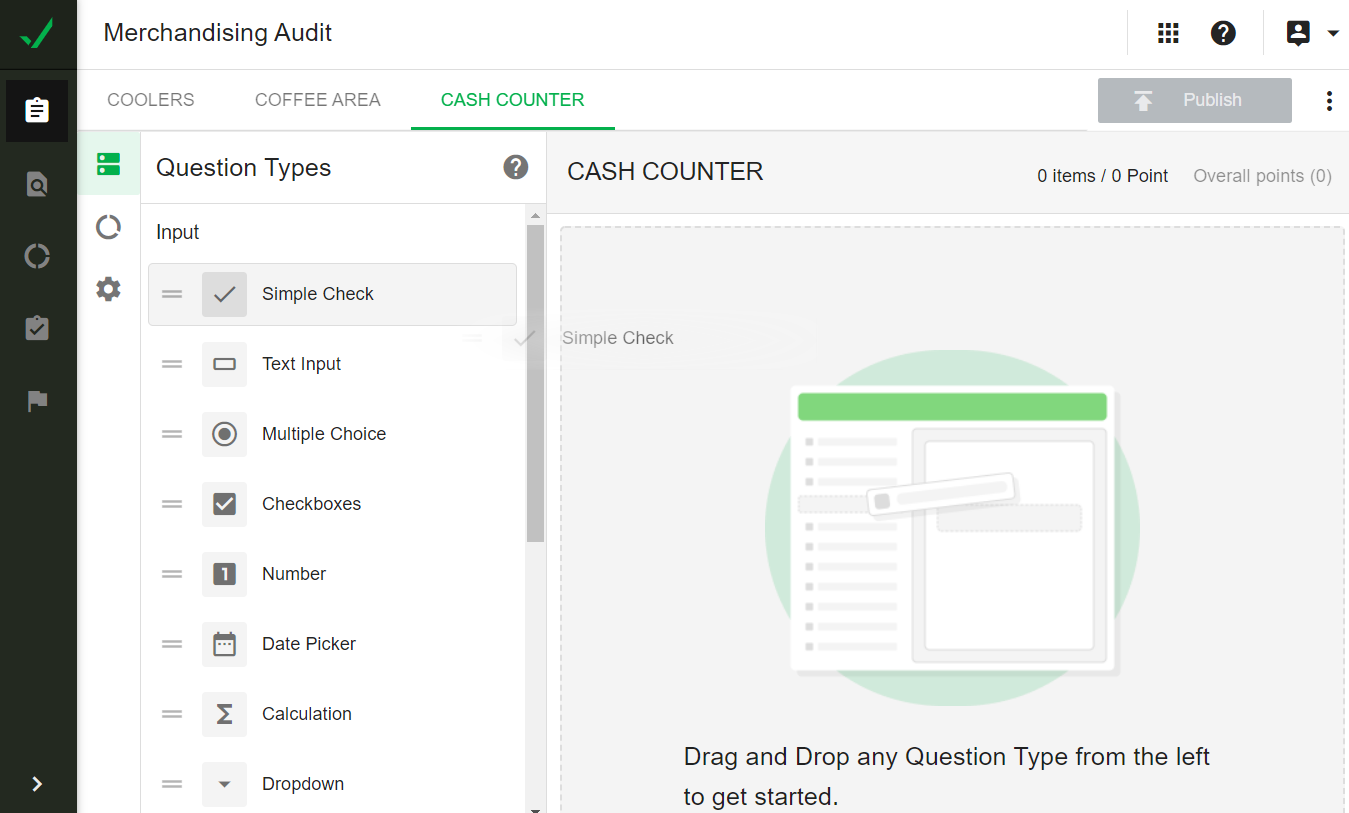
The question configuration user interface will open; enter the question text and other applicable settings for the question, then click on Save.
Each question type has specific settings. Learn more about the different question types and settings here.
After you've added your questions, you will see a summary of the number of items in that section, and the total points allocated to the section. You can also see the overall points for the entire checklist.
You can mouse over any question, then:
- Click/hold on the menu to the left of the question to drag and drop the question to a different position in the section
- Click on the triple dot menu to disable or duplicate the question. You can also use this menu to delete the question, or alternatively, also use this to move the question.
- Click on the pencil icon to edit the question label/settings
If you have already collected data on a checklist and need to remove a question, we recommend you disable the question rather than delete it.
A disabled question will no longer be seen by checkers, or in the individual record report for future checks, but can be reinstated at a later date and can still be used in custom dashboards and question reports.
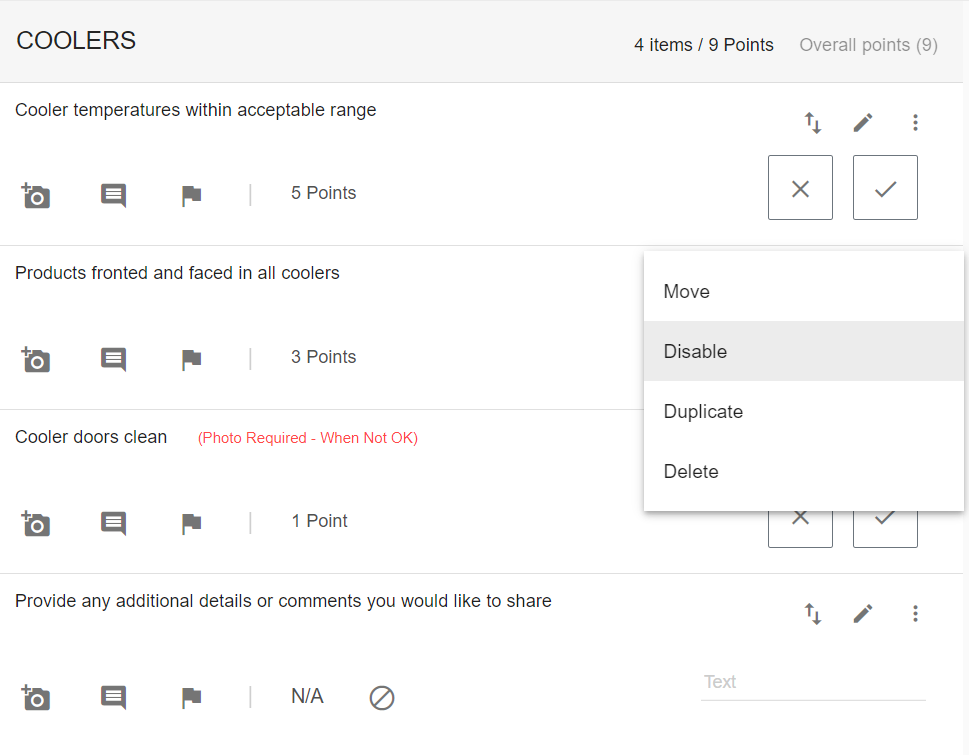

As can be seen, a question that is disabled is still viewable on the checklist by the admin, but will not appear on the checklist for the checker.
After you've added all your questions to your checklist, you may want to apply some skip logic and question tags.